还在用hexo d来推送你的Blog到Github上吗?本文教您如何使用Github Actions自动推送!
本文假定您已经有了Hexo blog的基础。如果没有,请左转用GitHub建立自己的博客
生成公私钥对 
首先,你需要准备一个ssh的公私钥匙对。你可以使用本地的 ssh-keygen 也可以使用在线网站,例如 https://8gwifi.org/sshfunctions.jsp 这样的公私钥生成器。生成完后,保存下你的公私钥(分别就是 Public key 和 Private key),准备之后的步骤使用
生成 Deploy key 
首先,进入你的 Github blog 仓库,也就是 yourname.github.io 然后点击 Settings. 在右边找到 Deploy keys
什么是 Deploy keys
Deploy keys 是为 git ssh 而生的。Deploy keys是一组公钥,只有拥有与这些公钥配对的私钥的人才能操作该仓库。
仓库的Deploy keys,是这个仓库的专有的key,用这个公私钥对,只能操作这个项目,其他项目都没有权限。
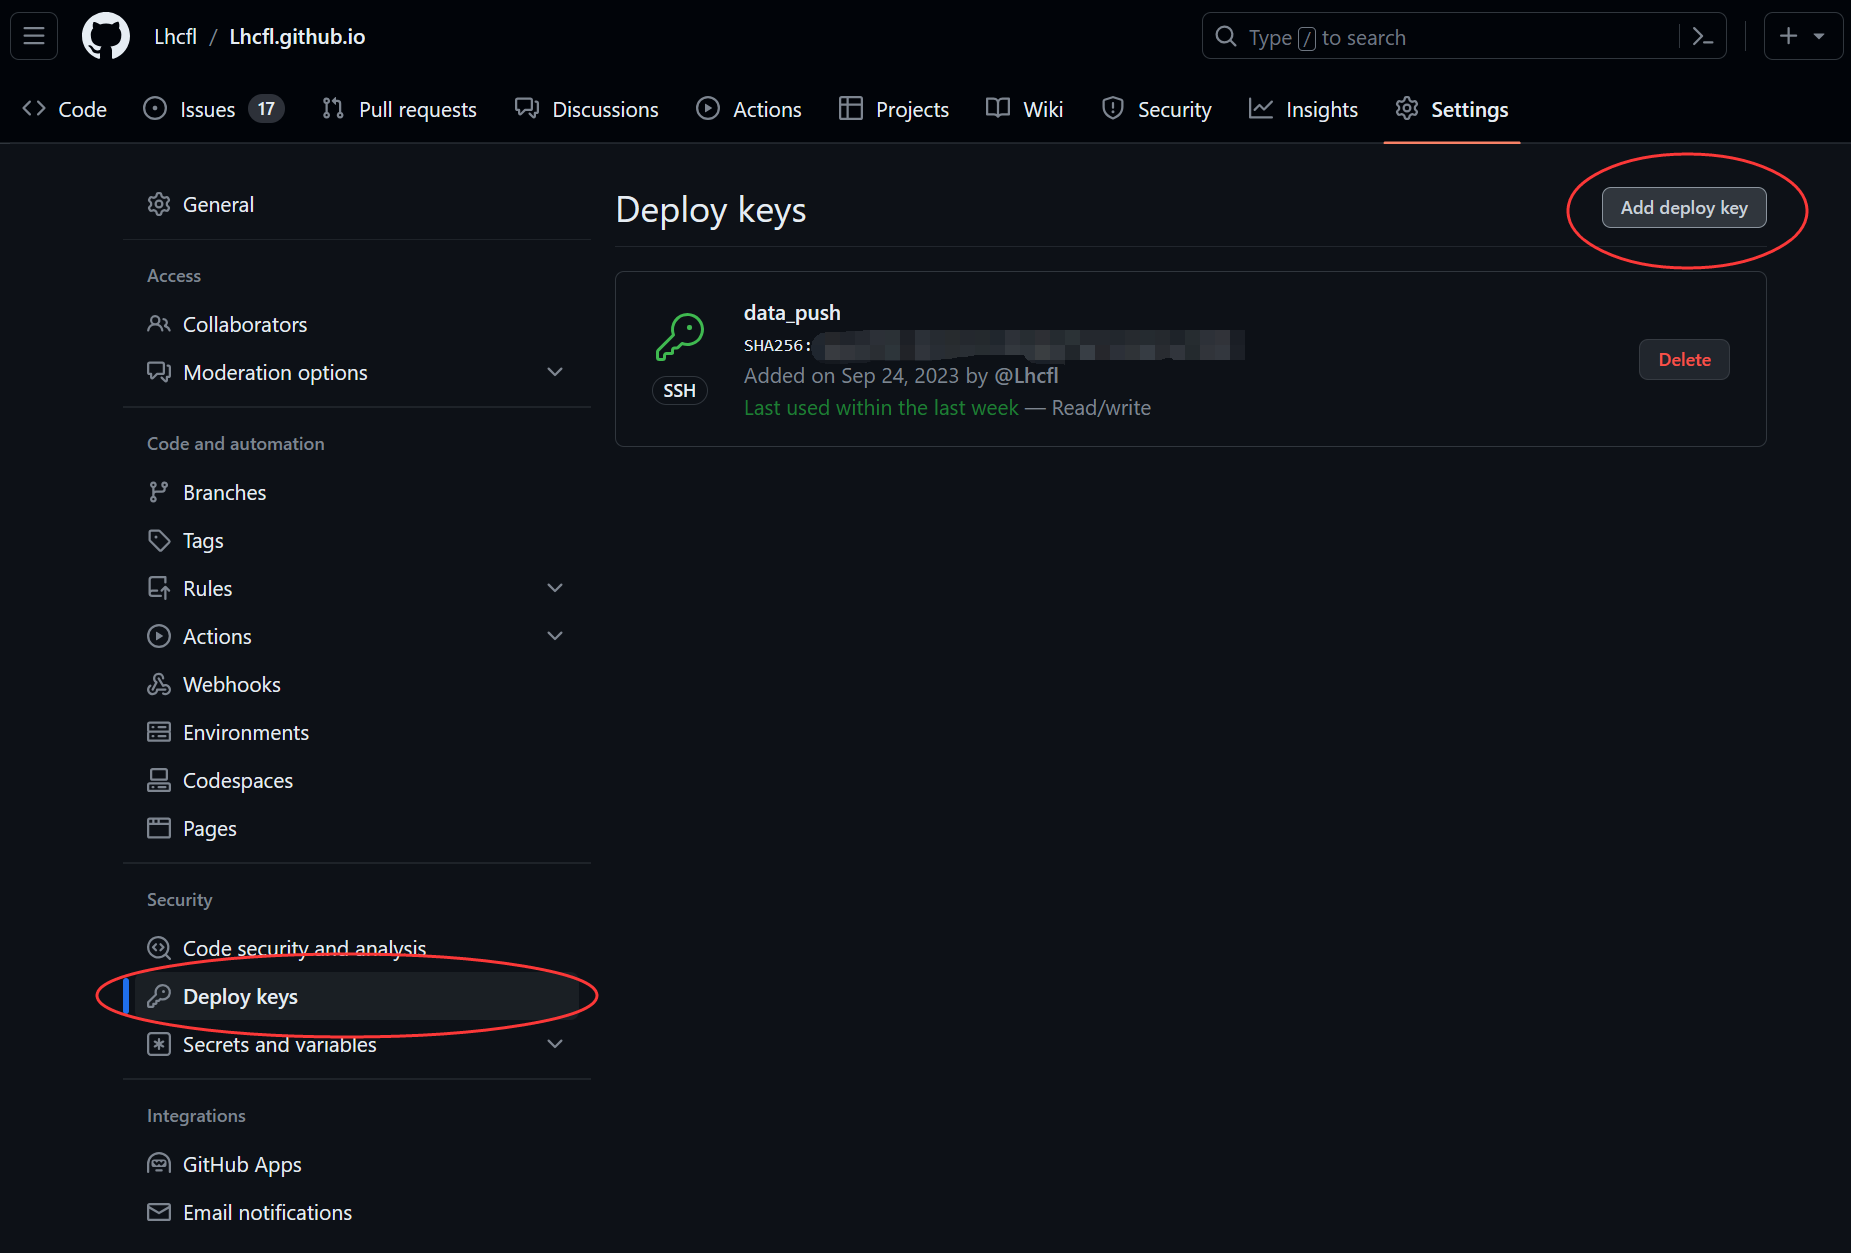
现在,点击右侧的 Add deploy key。将你生成的公钥粘贴到deploy key里面。勾选 Allow write access 以允许之后github actions push到你的仓库中。这里 title 可以随便填写,方便你自己记忆即可。
新建代码仓库 
进入你的 hexo blog 文件夹。现在,你需要在这里建立一个代码仓库,用作之后的数据存放
1 | git init |
build.sh 文件的作用是不用修改 .github/workflows 里的内容而修改你的自动化build操作。
gitignore 
编辑你的 .gitignore 文件,写入以下内容:
1 | .DS_Store |
这将忽略大部分会有hexo帮你生成的文件夹。
注意,我们这里把 themes 文件夹忽略掉了!因此,你必须在之后的部署中把你的主题下载回来。这里我们以我用的主题 Anatolo 为例子。
首先,把你的主题所改动的文件复制出来,放到asserts文件夹里。例如我改动了 Anatolo 主题里面的 source/images 文件夹,于是我把这整个文件夹复制到了blog的根目录的 asserts/images 文件夹。
修改 build.sh 
编辑 build.sh 文件,对于我来说,我需要写入以下内容:
1 | mkdir themes |
mkdir themes的作用是创建被我们忽略掉的themes文件夹git clone把这个主题从github上clone到themes中间- 后面的两个
cp是将我们需要对主题进行的改动复制进去 - 两个
npm install是需要Anatolo主题安装后需要进行的操作。(实际上它应该已经保存在了node modules里面,可以不写) npx hexo g将blog生成到/public文件夹中
现在,执行 build.sh 应该可以正常生成一个你的blog了。
上传到 github 
现在,去github创建一个 Private 仓库。注意,如果你不希望别人只需要简单的 fork 一下就能创造一个和你一模一样的仓库,甚至暴露你的配置文件中可能涉及到的私有信息,那就选择 Private
现在, git remote add origin <你的仓库地址>。将你的hexo 仓库上传上去。
配置 Actions 
去你的private仓库里,打开 Settings ,找到左侧的 Actions 里的 General,右边会有 Actions permissions。 把它切换成 Allow all actions and reusable workflows
配置 secret 
去你的private仓库里,打开 Settings ,找到左侧的 Secrets and varibles 里的 Actions,点击 New repository secret.这里我们Name填写 DEPLOY_PRI (后面的代码会用到)。Secret就填写你刚刚生成的私钥。
创建 Workflow 
在你的hexo文件夹里新建 .github\workflows\build.yml, 编辑,写下以下内容:
1 | name: Build |
把yourname@yourname.github.io.git换成项目的地址,注意要用SSH格式的。
大功告成了!现在 git add . 和 git commit 然后 git push origin main。
你的Github blog应该可以自动推送了。